How-to: Setting up client endpoints for Exact Lightweight Integration Server (ELIS)
Introduction
This document describes the way to
configure a product or client for Exact Lightweight Integration Server (ELIS).
The supported actions are adding, editing, and removing a product or client.
Scope
This document describes the following:
- Installing a product or client in ELIS.
- Editing and removing a product or client.
- Dealing with different scenarios that occur
during editing or deleting a client.
Prerequisites
- ELIS management
console
- Endpoint package (Exact Synergy Enterprise and
Exact Globe+)
Installing products
To install a product, go to Products,
and then click Add on the ELIS management console. The following
screen will be displayed:
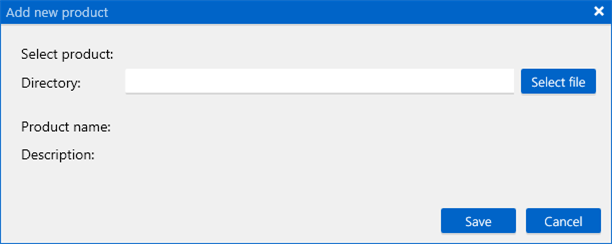
At Directory, click Select file
to select the endpoint package.
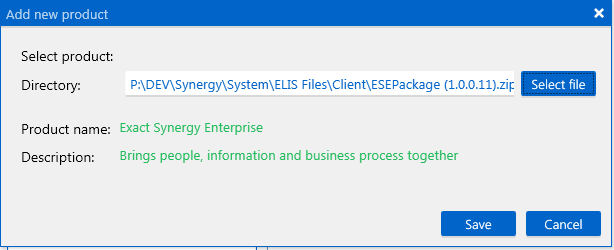
Click Save.
Once the package is installed, the main
navigation tree will be updated and the installed package will be added in the Products
screen.

Removing products
To remove a product, click Remove, and
then click OK.
Installing endpoints
Note: The user credentials must be defined if you are using Service management or Central Master Data Management (CMDM).
Installing Exact Synergy Enterprise
To set up the Exact Synergy Enterprise
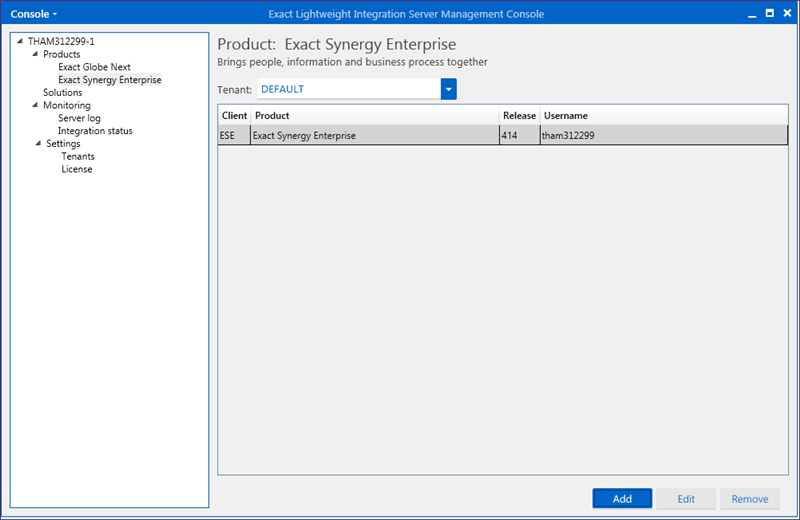
client endpoint, select Exact Synergy Enterprise under the Products category
in the ELIS management console, and the following screen will be
displayed:
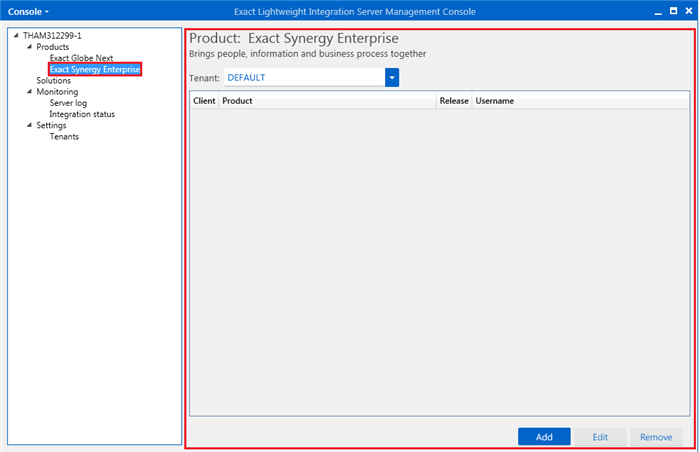
After selecting the required tenant at Tenant,
click Add to add the new endpoint. The following screen will be
displayed:
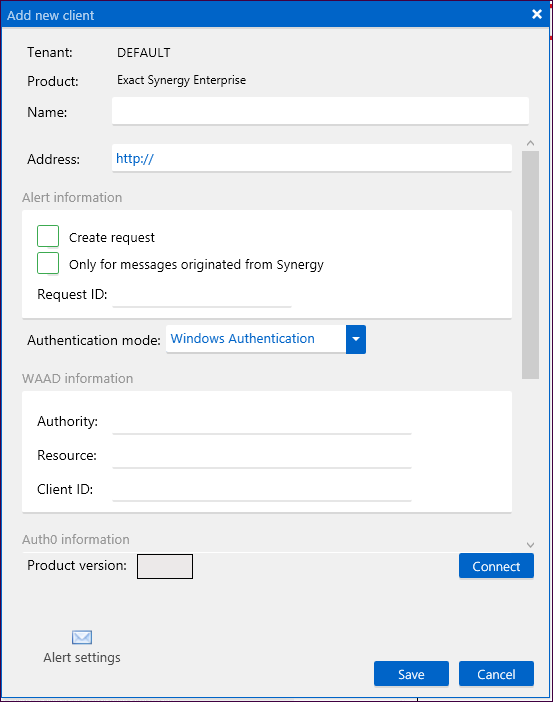
Use the scrollbar to view all the fields in this screen.

Define the following fields:
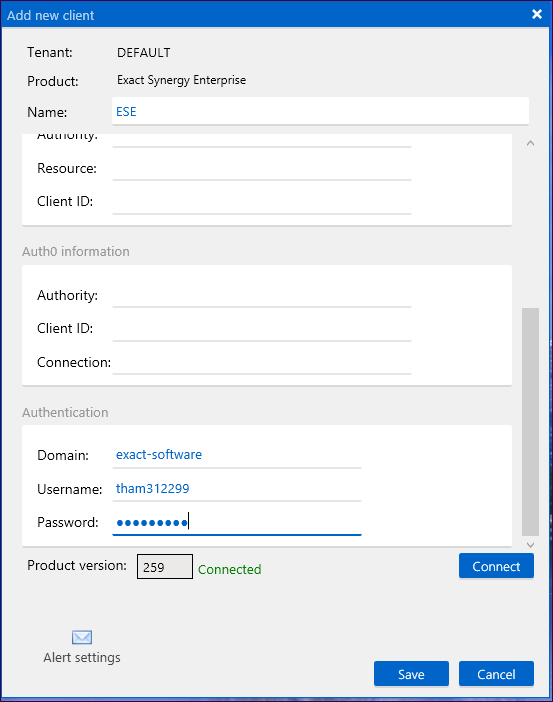
Click Connect in the Add new
client screen to check whether the selected endpoint is valid. If the
endpoint is valid, the product version and word “Connected” will be displayed.
Click Save to save the endpoint in the server. For example:
Note: You
cannot save the endpoint if it is invalid.
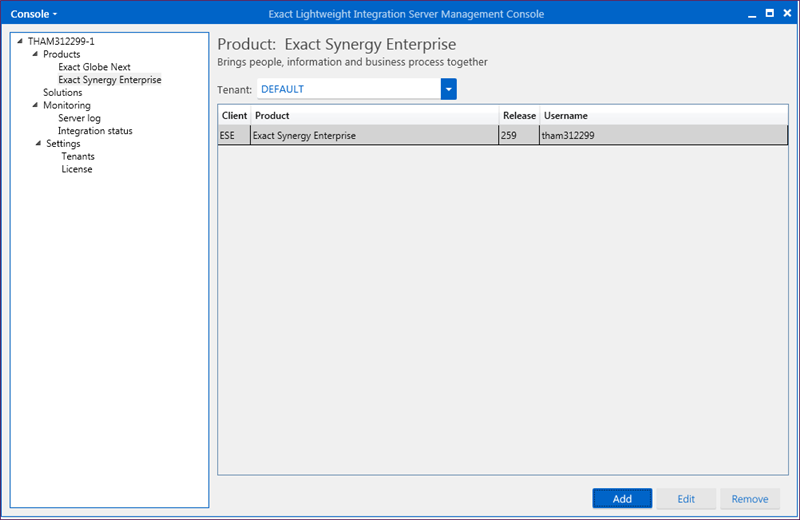
The created endpoint will be displayed in
the main screen.
Installing Exact Globe+
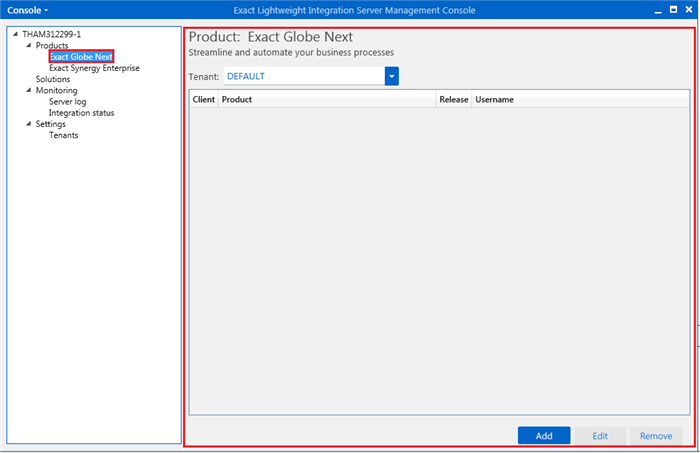
To set up the Exact Globe+ client
endpoint, select Exact Globe+ under the Products category in
the ELIS management console, and the following screen will be displayed:
After selecting the required tenant at Tenant,
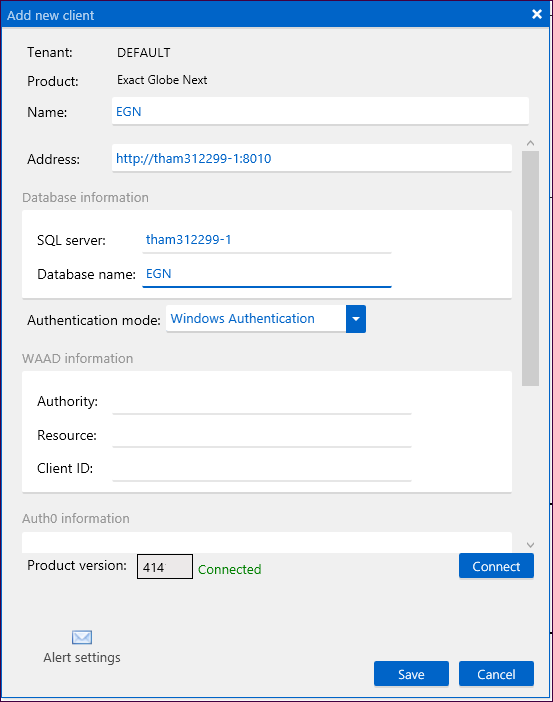
click Add to add the new endpoint. The following screen will be
displayed:
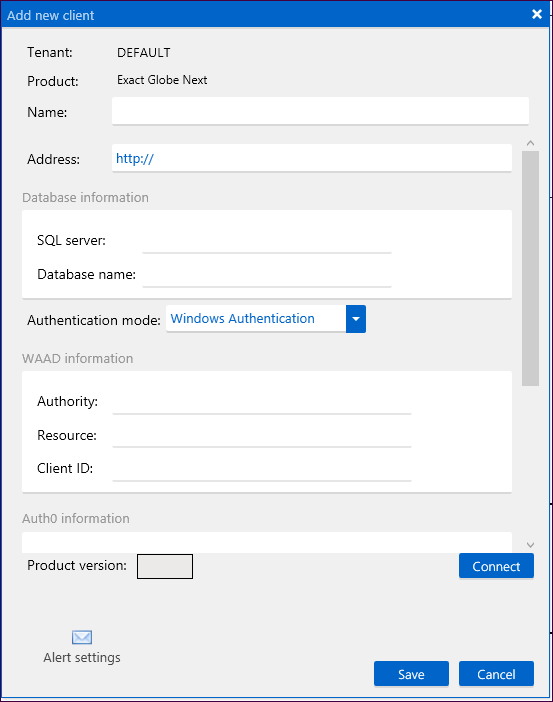
Use the scrollbar to view all the fields in this screen.

Define the following fields:
Click Connect in the Add new
client screen to check whether the selected endpoint is valid. If the
endpoint is valid, the product version and word “Connected” will be displayed.
Click Save to save the endpoint in the server. For example:
Note: You
cannot save the endpoint if it is invalid.
The created endpoint will be displayed in
the main screen.
Editing endpoints
Open the product to be edited in the ELIS
management console.
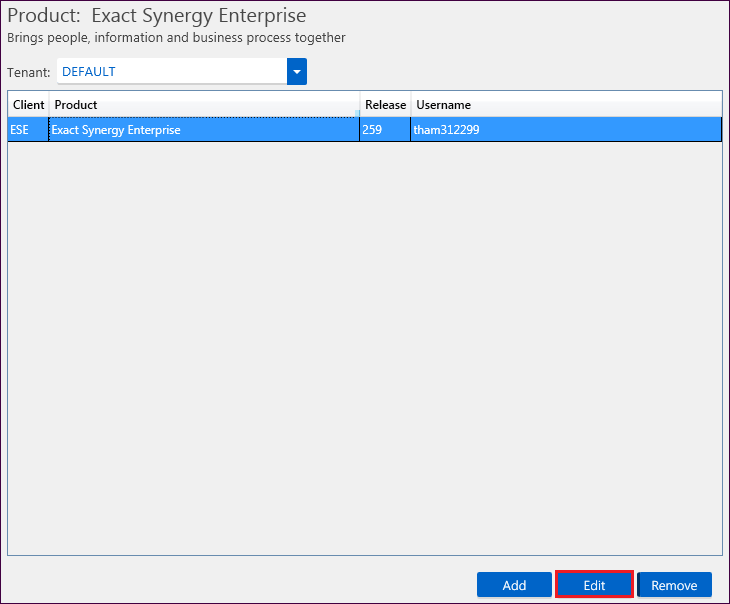
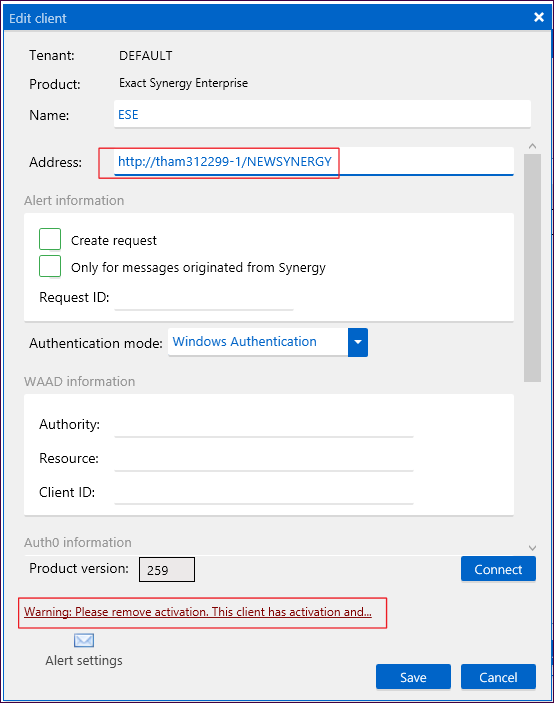
Click Edit. The following screen
will be displayed:
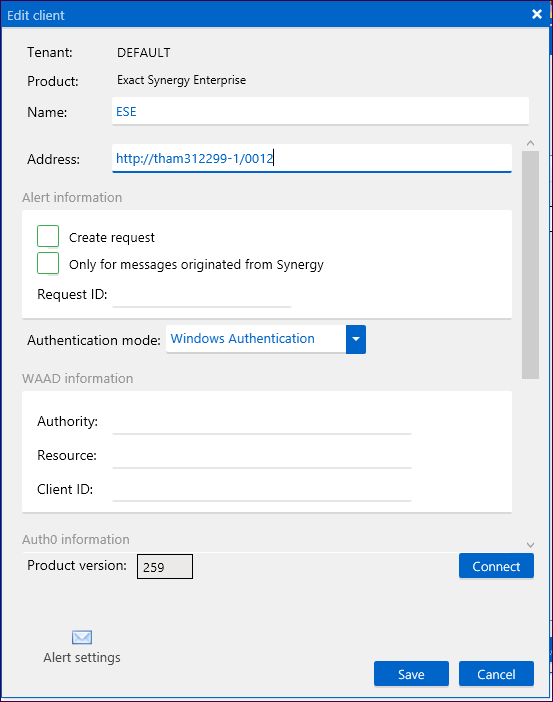
Note: If any
there is an activation linked to the endpoint, the Address, Database
server name, and Database name fields cannot be edited until the
activation is removed. The Database server name and Database name
fields are only available for the Exact Globe+ endpoint product.
Removing endpoints
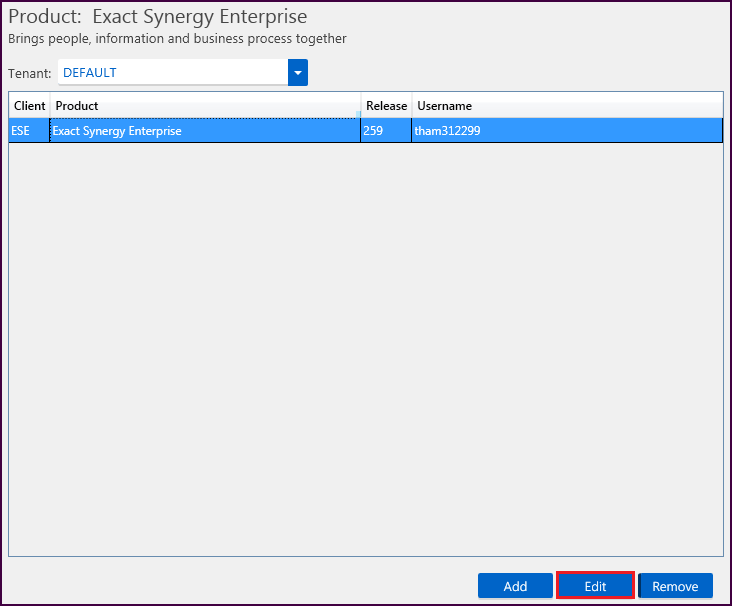
To remove an endpoint, open the product to
be edited in the ELIS management console, and then click Remove. After
that, click Yes to proceed with the removal of the endpoint.
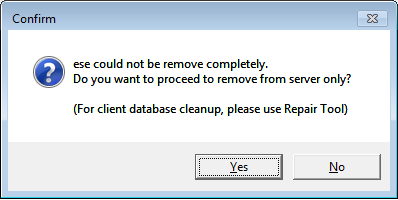
Note: If the
endpoint is no longer valid, the following confirmation message will be
displayed. If you click Yes, only the endpoint in the server will be
removed while the records will still be in the client database. Use the repair
tool to remove the records from the client database.
Related documents
| Main Category: |
Attachments & notes |
Document Type: |
Online help main |
| Category: |
|
Security level: |
All - 0 |
| Sub category: |
|
Document ID: |
26.176.396 |
| Assortment: |
Exact Synergy Enterprise
|
Date: |
01-08-2024 |
| Release: |
254 |
Attachment: |
|
| Disclaimer |