How to map a XML file to the Exact Schema :
Issue :
I have a XML file and i want
to import this file into Exact with XML Server. What do i have to
do to make this possible ?
Solution :
If your XML file is not
according to the XML Schema of Exact we must transform the XML file
to the XML format used by Exact. There are lots of tools available
that can help you but in this example we will use Stylus Studio.
You can follow this
hyperlink to obtain an Evaluation copy of stylus
studio. If your document is still in the CSV format you first have
to convert your CSV file to a HTML file. You can follow
this hyperlink to obtain information how to do
this.
Below is a description of the
procedure you could follow to map a XML file to the Exact
Schema.
·
Start Stylus Studio
·
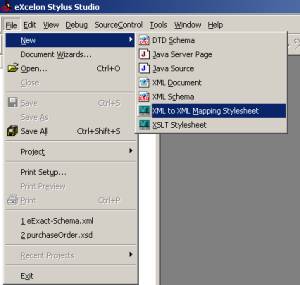
Select the menu option 'File -> New -> XML
to XML Mapping Style sheet' below is a screenshot of the
menu.
·
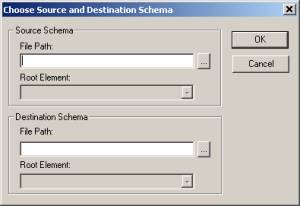
A screen with the Source and destination will
appear. Below is an Example of this.
·
You have to enter a source path and a destination
Schema. The source file is the file you want to transform to the
Exact Schema. So here you must select your XML file.
·
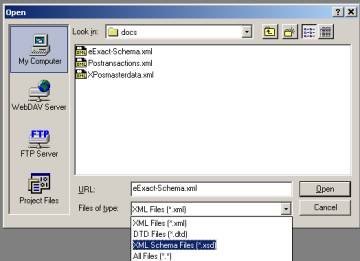
The destination is the file :
eExact-Schema.xsd located in the DOCS directory of
your Exact installation. Make sure you change the file type to :
XML Schema files
·
Then you have to select the XML Schema file :
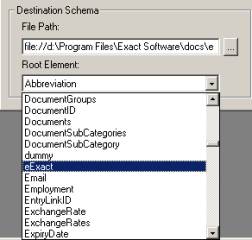
eExact-Schema.xsd. After selecting the Schema file
you have to set the root element. Make sure you select
eExact here.
·
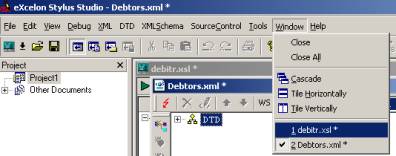
The program will now show the XML mapper. If not
make sure you select the XSL in the window menu option.
·
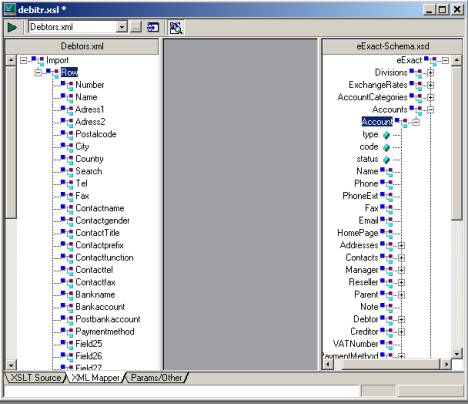
In the XML mapper you will see the import file on
the left and you will see the destination on the right. Expand the
tree, and expand the topic that you want to map. In this example we
will map the DEBTOR file so we will expand the topic Accounts.
Below is a screenshot of this.
·
In this screen you can map the fields from the
source to the destination. Below is an example of this. Only a
couple of fields are linked yet. Also there is a difference between
the lines between the fields. There are dotted lines and normal
lines.

·
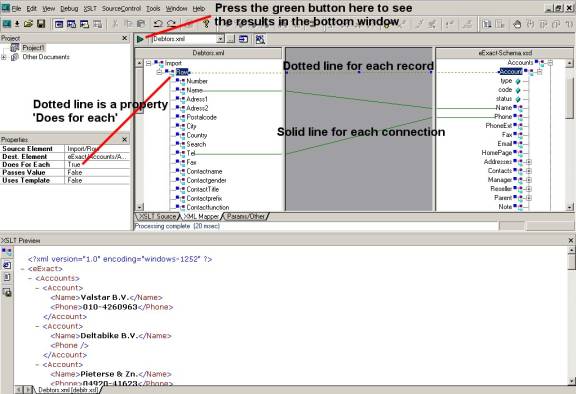
The Row must be connected to the Account. Each row
in the source corresponds with an account in the destination. Make
sure the line from row to account is a dotted line. You can change
this in the properties of the connection. Below is a screenshot
with some basic functions are explained. On the left there is a
little window with properties. Here you can modify the property
'Does for each'. If 'Does for each' is true it will be a dotted
line and if the property is false it will be a solid
line.
·
After all the connections have been made you must
make sure this will be imported as an active customer. To do so you
have to set some fields with a fixed value. These fields are
circled red in the picture below.

·
In these fields we have to enter a fixed value to
make these records really debtors. The field 'Type' must be filled
with a 'C' of Customer and the
field 'Status' must be 'A' from Active. To set
these values just 'right-click' on the field and select 'Set
literal value'. Then you have to make sure to enter the correct
value.
·
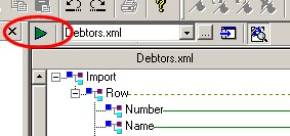
If everything is mapped correctly you can apply
the transformation on your input file and view the result. Click on
the green triangle to start the transformation.
·
If everything went well you can view the results
in the XSLT Preview window. In the upper left corner of the XSLT
preview there are several buttons.

·
One of these buttons is used to save the preview
to disk. Make sure you use the extension XML when you save the
preview. You can use Globe2000 or Synergy to import the transformed
XML file.
When you map the fields you are actually
creating an XSLT file. In the XSLT file all the mappings are
stored. But it is also possible to transform values from one value
into another. For example if a mailcity is empty you cannot import
a debtor. It would be nice if there would be some logic to fill the
field mailcity with a value ('Unknown' or '-') when it is
empty.
Follow this hyperlink for an example.