How-to: Using ELIS Migration Tool for Exact Lightweight Integration Server (ELIS)
Introduction
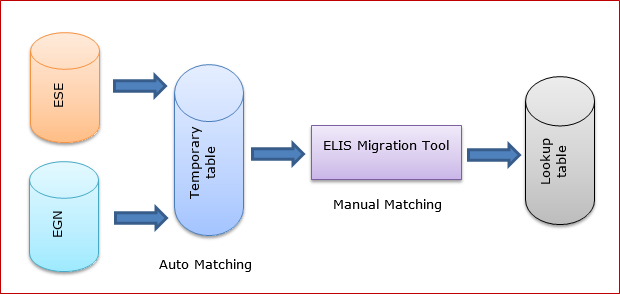
The migration tool is used to map the
unique keys of both Exact Synergy Enterprise and Exact Globe Next into the
lookup table to solve the inconsistencies of the unique keys. The unique keys
are used for synchronization. Thus, if the synchronization fails, the unique
keys created in Exact Synergy Enterprise and Exact Globe Next will be
different. The migration tool is an executable file that gathers all the
unmatched unique keys from the Exact Synergy Enterprise and Exact Globe Next
databases, and matches the unique keys automatically or manually. The mapped
unique keys will be stored in the lookup table.
Scope
This document describes the following:
- Matching the unique keys automatically using the
migration tool.
- Matching the unique keys manually using the
migration tool.
Prerequisites
- Exact Synergy Enterprise
- Exact Globe Next
- Exact Lightweight Integration Server (ELIS)
- Migration tool
Matching the unique keys
- Start the ELIS migration tool via the shortcut on your desktop or the Start menu.
- If ELIS is configured for Windows, the following screen will
be displayed:
- If ELIS
is configured for the federated identity authentication, the following
screen(s) will be displayed:
- If the Remember
password feature is not enabled in the ELIS
console, the following screen will be displayed:

- The ELISServer, and Auth0 User Name or WAAD User
Name values displayed are based on the installed ELIS configuration. Type your password and click Login.
- If the Remember
password feature is enabled, or you have logged in via the ELIS Migration Tool – Login screen
above, the following screen will be displayed:

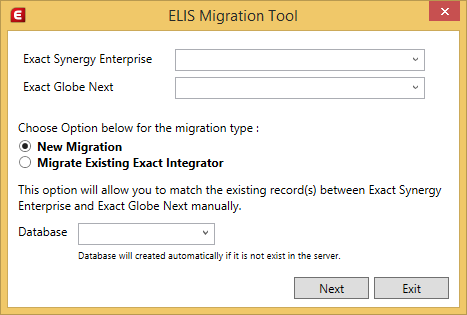
- Define the following fields (if available):
- Exact Synergy Enterprise - Select the Exact Synergy Enterprise client endpoint that you want
to match.
- Exact Globe Next - Select the Exact Globe Next client endpoint that you want to match.
- New migration - Select this option to create a migration. This
option should be selected. This option is available only for the on-premise ELIS installations.
- Database - Select
the database that you want to store all the matching information or type a database
name to create a database for the matching information. If a database is
selected, the tool will generate the necessary tables to the database to store
the matching information. This option is available only for the on-premise
ELIS installations.
- Click Next. The following screen will be
displayed:
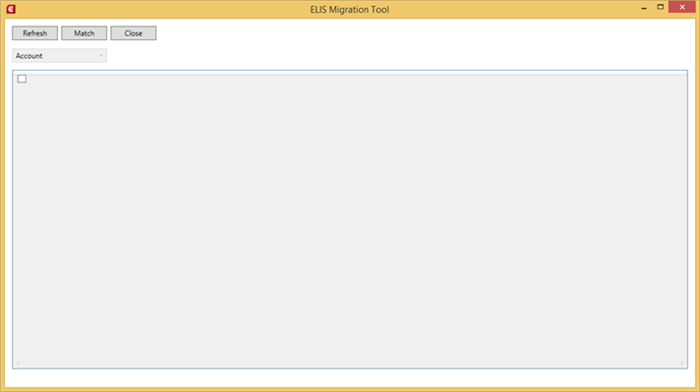
- Click Refresh. The following screen will
be displayed:
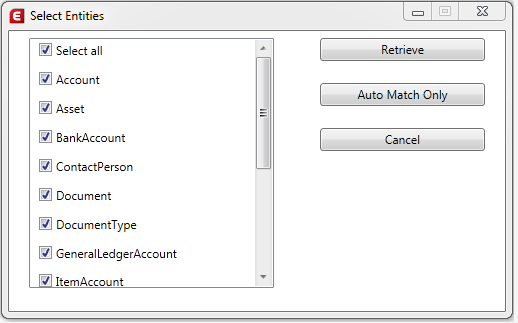
- Select the required entities, and then click Retrieve
to retrieve the entities from the database and match the entities, or click Auto
Match Only to match the entities only. All the migration tool tables from
Exact Synergy Enterprise and Exact Globe Next will be truncated and displayed
in the following screen. The matching result is based on the lookup table (1-N
solution) and all the unmatched data will not be displayed. The configuration
is taken from the “MacroManager.config” file, and the records will be matched
automatically and stored in the matching table. The following screen also displays
all the records from the matching table, such as the entity name, logical key
value, ID from Exact Synergy Enterprise, and ID from Exact Globe Next. The
matching table will contain all the records from Exact Synergy Enterprise and
Exact Globe Next that are not available in the lookup table after the automatic
matching process. By default, the records of the accounts are displayed. You
can select to display the unmatched accounts or contact persons.
Double-click a record
in the Mini Migration Tool screen to view the Properties / Manual
Match screen (refer to the Properties / Manual Match screen
section). The Properties / Manual Match screen is available only for the
contact person entity.
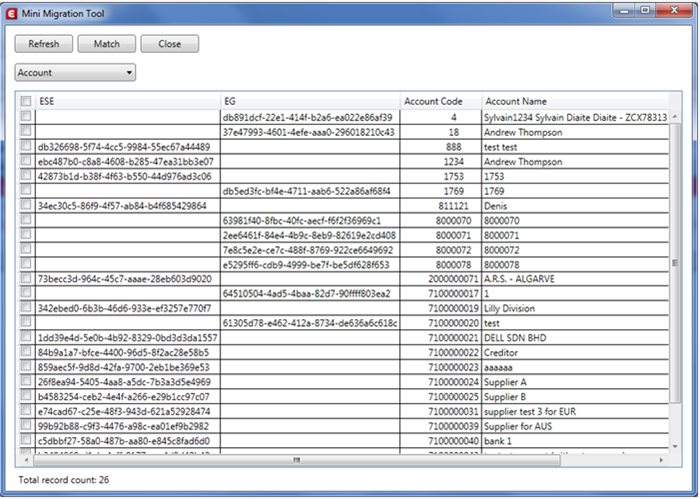
- Select the check boxes of the records to be
matched and stored in the lookup table. All the records should be selected.
- Click Match to match the selected
records. A message will be displayed once Match is clicked. Click OK.
The records from the matching table will be copied and inserted in the key
lookup table.
- Click Close to exit.
The
following tables will be generated in the ELIS database:
- KeyLookupGUID
- KeyLookupInt
- KeyLookupString
The automatic matching of the contact person is based on the
XML import and export login with the scoring system such as the following:
|
Score
|
Condition
|
|
5
|
First name matched
|
|
3
|
Middle name matched
|
|
3
|
Initials matched
|
|
2
|
Email matched
|
|
1
|
Either the XML first name data or the record first name data
is not empty
|
|
1
|
Either the XML middle name data or the record middle name data
is not empty
|
|
1
|
Either the XML initial data or the record initial data is not
empty
|
|
1
|
Either the XML email data or the record email data is not
empty
|
|
0.5
|
If the contact is the main contact person
|
For the contact person to be displayed, the score must be
equal to or greater than 11.
Properties / Manual Match screen
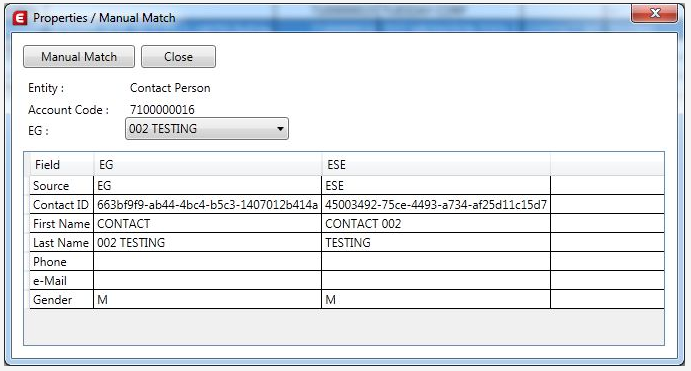
The following screen displays the
information of the contact person that you have selected in the Mini
Migration Tools screen. The records are derived from Exact Synergy
Enterprise and Exact Globe Next. You can compare the details of the records and
manually match the contact person by selecting a different contact person from
the same account. This screen is available only for the contact person entity.
To
view the Properties / Manual Match screen, do the following:
- In the Mini Migration Tool screen, select
Contact Person.
- Double-click a contact person in the overview. The
Properties / Manual Match screen will be displayed with the information
of the contact person, such as entity name, account code, data from Exact
Synergy Enterprise, and data from Exact Globe Next.
Depending on the
contact person record that was selected in the Mini Migration Tool
screen, you can select the contact person data under the EG or ESE
column in the Properties / Manual Match screen. The scenarios will be as
follows:

- Click Manual Match to match the records.
A confirmation message will be displayed. Click Yes.
- Click Close to exit. Once the screen is
closed, the overview in the Mini Migration Tool screen will be refreshed
with the matched record.
Related documents
| Main Category: |
Support Product Know How |
Document Type: |
Online help main |
| Category: |
On-line help files |
Security level: |
All - 0 |
| Sub category: |
Details |
Document ID: |
26.185.176 |
| Assortment: |
Exact Synergy Enterprise
|
Date: |
01-11-2018 |
| Release: |
254 |
Attachment: |
|
| Disclaimer |