How-to: Opening and saving e-mails in Microsoft Outlook
Introduction
Synergy Office Integration provides a closer integration between Exact Synergy Enterprise and Microsoft Outlook. You can save incoming and/or outgoing e-mails with attachments to Exact Synergy Enterprise as documents by using the Save or Save as features. These features are available once you have successfully logged in to Exact Synergy Enterprise in Microsoft Outlook.
With this, you can conveniently transfer all important information in your e-mails including attachments to Exact Synergy Enterprise.
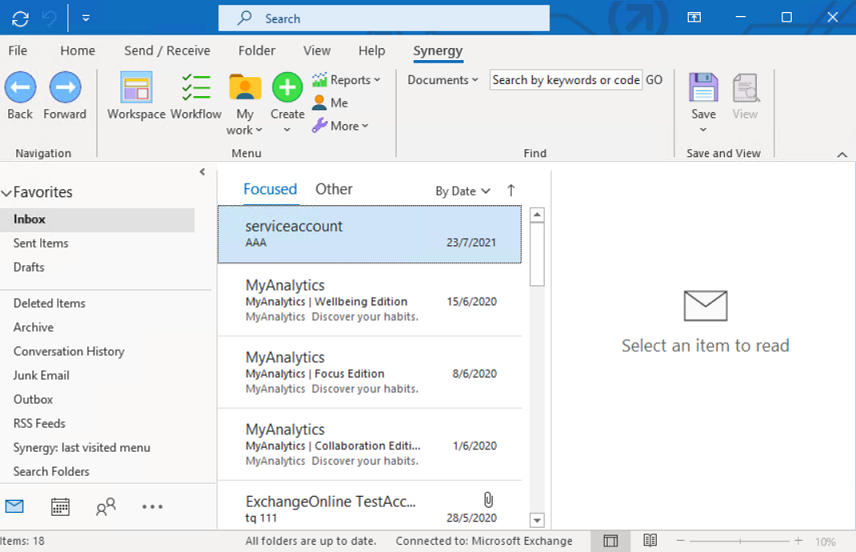
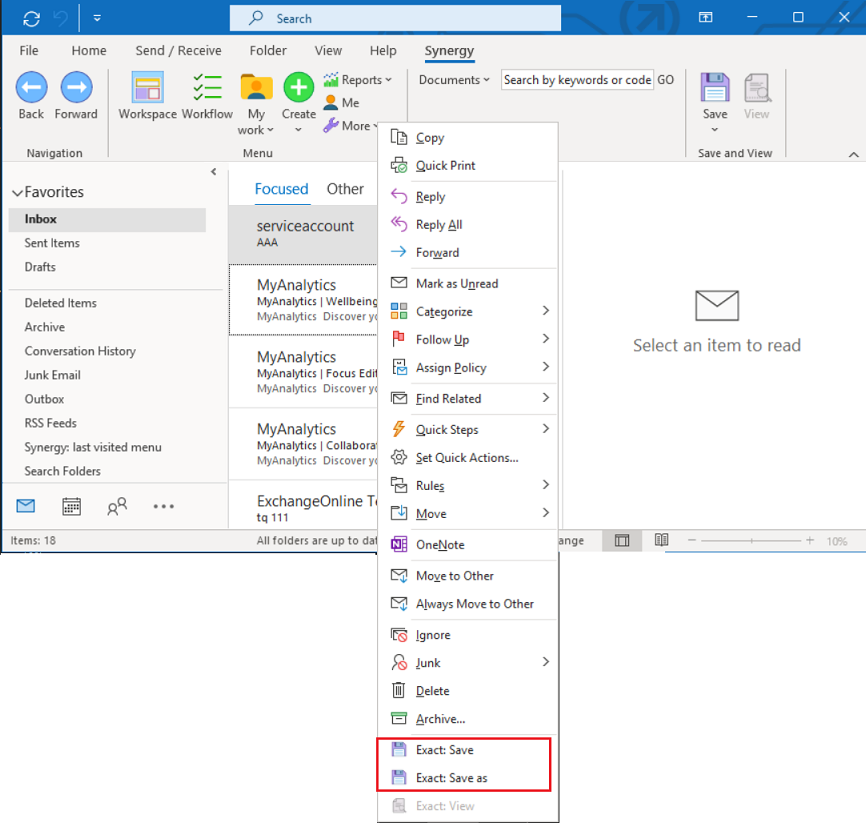
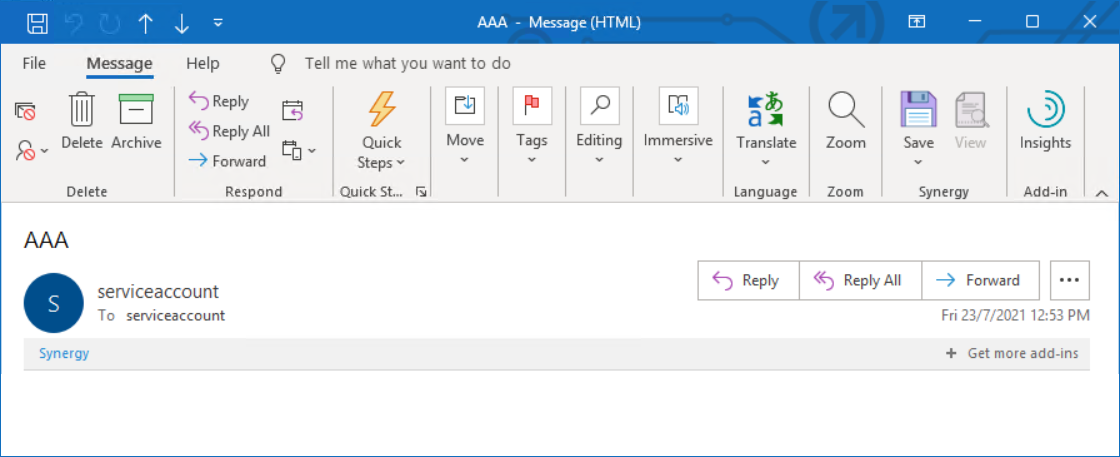
The Save and Save as features are available in the following places within Microsoft Outlook:
a) on the Synergy ribbon:

b) under the Synergy menu bar:

c) on the right-click context menu when you right-click on a selected e-mail.

d) on the Synergy ribbon when you double-click an e-mail to open it in a new window.

Before you use this feature, you have to define the document types for the documents created in Exact Synergy Enterprise. Via this feature, the document type of the document will follow the settings defined in the Office Integration tab in Exact Synergy Enterprise at System à Setup à Settings - General à Preferences.
If the settings in the Office Integration tab are not defined, the settings defined in the Corporate (Office Integration) tab will be used. If the settings for both tabs have not been defined, clicking Save will be the same as clicking Save as.
How do I save an e-mail to Exact Synergy Enterprise with the Save feature for incoming or outgoing e-mails?
1. Open your Microsoft Outlook, and then double-click an e-mail to open the e-mail or click New to compose an e-mail.
2. Click  Save on the Synergy ribbon to save the e-mail and its attachment (if available) to Exact Synergy Enterprise. For outgoing e-mails, proceed to Step 3. For incoming e-mails, see Step 4.
3. Click Send to send the e-mail to the selected recipient(s) and for the document(s) to be created in Exact Synergy Enterprise. For an example, if you are sending the email to two recipients whose e-mail addresses are the same as the ones filled in the respective contact cards, two documents with the same contents will be created. For more information, see How-to: Performing automatic linking of account based on contact person.
4. You can click  View to view the saved e-mail in a document via a pop-up browser.
Note:  View is available only if an e-mail is successfully saved to Exact Synergy Enterprise.
Via this feature, you can define the properties of the document, such as the document type and subject as and when an e-mail is saved to Exact Synergy Enterprise.
How do I save an e-mail to Exact Synergy Enterprise with the Save as feature for incoming or outgoing e-mails?
1. Open your Microsoft Outlook, and then double-click an e-mail to open the e-mail or click New to compose an e-mail.
2. Click  at
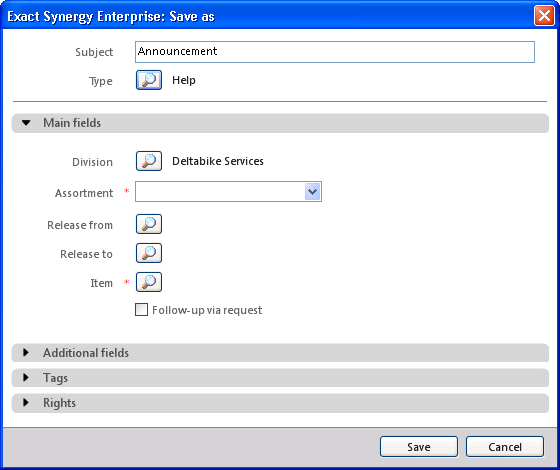
at  Save on the Synergy ribbon, and then click Save as. The following screen will be displayed for you to define the properties of the document, as shown in the following screen:

3. Fill in the mandatory fields that are marked with  . You can click
  to expand each section and fill in more information.
Note: Besides Subject, Type, Main document, and Follow-up via request, the availability of other sections and/or fields are dependent on the settings of the document type selected.
4. Click Save to save the e-mail. For outgoing e-mails, proceed to Step 5. For incoming e-mails with the Follow-up via request check box selected, see Step 6.
5. Click Send to send the e-mail to the selected recipient(s) and for the document(s) to be created in Exact Synergy Enterprise. For an example, if you are sending the email to two recipients whose e-mail addresses are the same as the ones filled in the respective contact cards, two documents with the same contents will be created. For more information, see How-to: Performing automatic linking of account based on contact person.
6. If you have selected the Follow-up via request check box to immediately create a request, the following screen will be displayed for you to select the request type of the request that you want to create:

7. Select a request type, and then click New. You can now fill in the details of the request, and then click Submit to send to the particular resource(s). For more information, see New request menu.
Additional information
Related document
| Main Category: |
Attachments & notes |
Document Type: |
Online help main |
| Category: |
|
Security level: |
All - 0 |
| Sub category: |
|
Document ID: |
19.013.042 |
| Assortment: |
Exact Synergy Enterprise
|
Date: |
06-09-2021 |
| Release: |
|
Attachment: |
|
| Disclaimer |