Installation and configuration of Microsoft IIS for E-WMS on Windows Server 2003
Pick-IT
Introduction
This document describes the steps to install and configure Microsoft IIS in Windows Server 2003 for
WMS ASP. Prerequisites are the installation of Microsoft .NET Framework and Globe with
WMS.
Description
installation of IIS
In Windows 2003, go to Start/Settings/Control panel/Add or remove programs.
Click on 'Add/Remove Windows Components' in the left pane.
In the list of Windows Components, select the checkmark before 'Application Server' and press 'Details'.

Select the following options in the list for 'Application Server':

- Application Server Console
- ASP.NET
- Enable network COM+ access
- Internet Information Services (IIS)
press Details on 'Internet Information Services (IIS)' and enable:

- Common Files
- Internet Information Services Manager
- World Wide Web Service
press Details on 'World Wide Web Service' and enable:

- Active Server Pages
- World Wide Web Service
Press OK until the screen showing 'Application Server' as enabled option appears again, and press Next.
Now Windows will start installing, you may need the original Windows 2003 installation CD.
Configuration of IIS
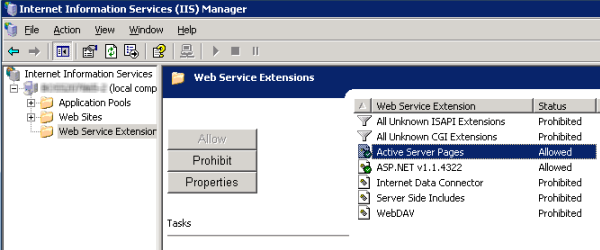
The IIS manager can be started with Start/Programs/Administrative Tools/Internet Information Services (IIS) Manager, or by selecting Start, Run and typing INETMGR. First activate ASP by selecting 'Web Service Extensions', change 'Active Server Pages' and 'ASP.NET v*' in the right panel to 'allowed'.
Now, in the left panel, expand (server name), Web Sites, Default Web Site.
Right-click on Default Web Site and choose New, Virtual Directory.
In the Virtual Directory Creation Wizard, first press Next. Configure the following options:
- Alias: assign an alias for the WMS website, for instance
wms (remember you may have to type this name on a mobile device)
- Path: Type or browse to the path where WMS ASP IIS files are stored, for example C:\E-WMS\IIS.
- Permissions: enable Read and Run scripts (such as ASP)
After pressing Finish, a new virtual directory with the assigned alias has been created. Still some properties have to be defined.
Select the new created alias and press right-click, properties.
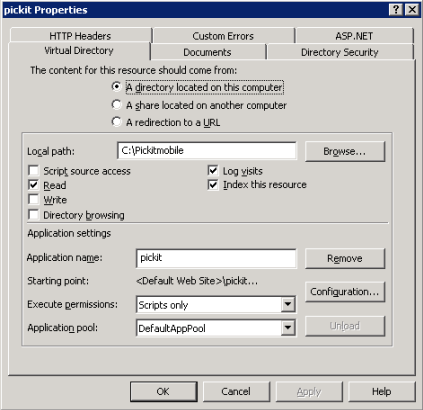
Virtual directory tab
When configured correctly before, nothing should need to be changed on this tab.
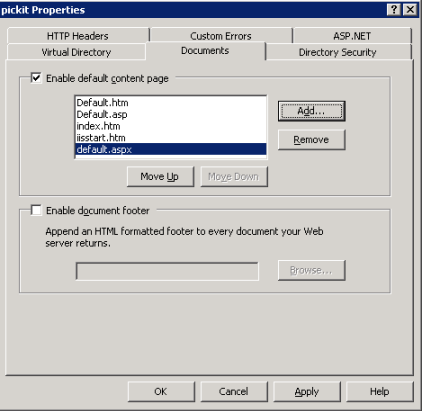
Documents tab
Press 'Add' and type default.aspx in the pop-up 'Default content page'. Press OK. This entry will now show in the list with default documents:
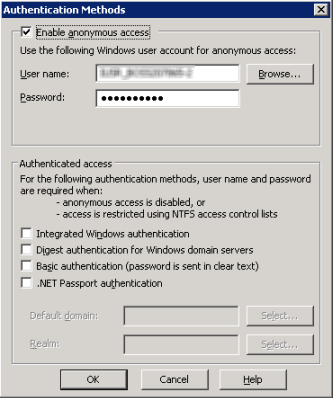
Directory Security tab
Press Edit in the section Authentication and access control. Make sure only the option Enable anonymous access is activated.
ASP.NET tab
Make sure that version 2.0.50727
(=Framework 3.5 SP1) is selected as ASP.NET version.
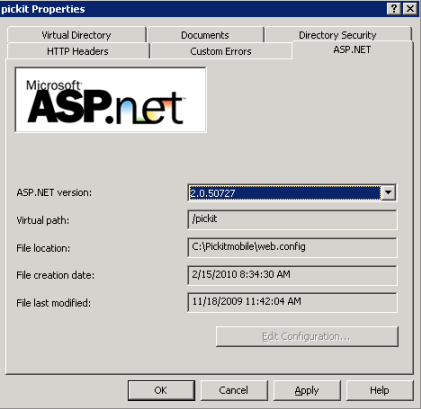
Press OK on the main properties screen to save all changed settings.
Enable 32bit applications on Windows Server 64 bit
If you are using Windows Server 2003 64 bit (x64), you will have to enable 32
bit application support by performing following actions:
- On the server, start the DOS prompt by selecting Start/Run, CMD
- type or paste following text on the DOS prompt:
cscript.exe %systemdrive%\Inetpub\AdminScripts\adsutil.vbs set W3SVC/AppPools/Enable32BitAppOnWin64
"true"
- if you receive an error after this command, involving "Type Mismatch,
ErrorNumber: 13(0XD)", try following variant instead:
cscript.exe %systemdrive%\Inetpub\AdminScripts\adsutil.vbs set W3SVC/AppPools/Enable32BitAppOnWin64
1
Testing
To test the working op WMS ASP you can select right-click, browse on the virtual folder you created. The Pick-IT login screen should show in the right panel.
Related documents
| Main Category: |
Support Product Know How |
Document Type: |
Support - On-line help |
| Category: |
On-line help files |
Security level: |
All - 0 |
| Sub category: |
temporary |
Document ID: |
20.244.058 |
| Assortment: |
E-WMS
|
Date: |
27-07-2012 |
| Release: |
|
Attachment: |
|
| Disclaimer |