How-to: Creating tenants in Exact Lightweight Integration Server (ELIS)
Introduction
Tenants can be created once ELIS is
installed. However, the creation of the tenants is optional. Multiple tenants
can be created in multiple environments. For example, you can create a tenant
for the production environment and a separate tenant for the test environment.
When you are
installing the products and clients at a later stage, you can select the tenants
that apply to the products and/or clients. However, the Default tenant
will be used. For more information, see How-to: Setting up client endpoints for Exact Lightweight Integration Server
(ELIS).
Scope
ELIS must be
installed. For more information, see How-to: Installing Exact Lightweight Integration Server (ELIS).
Creating tenants
- To create a tenant, open the ELIS management console. The
following screen will be displayed:
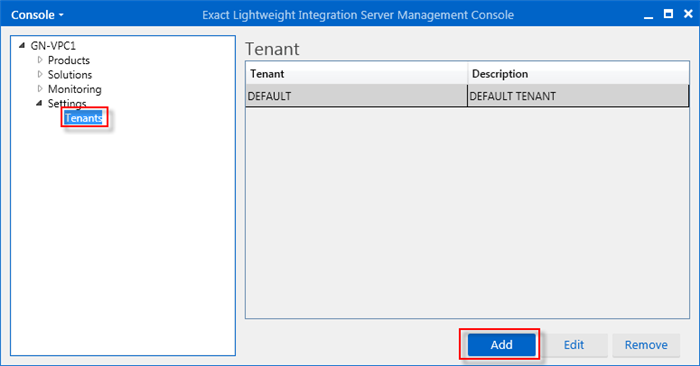
- On the left panel, select Tenants under Settings. The
default tenant will be displayed on the right panel. Click Add to add a
tenant. The following screen will be displayed:
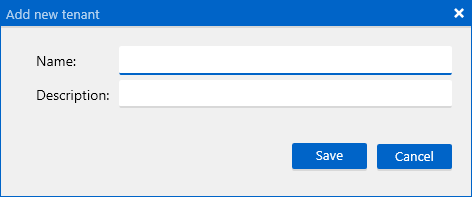
- Type a name and description for the tenant.
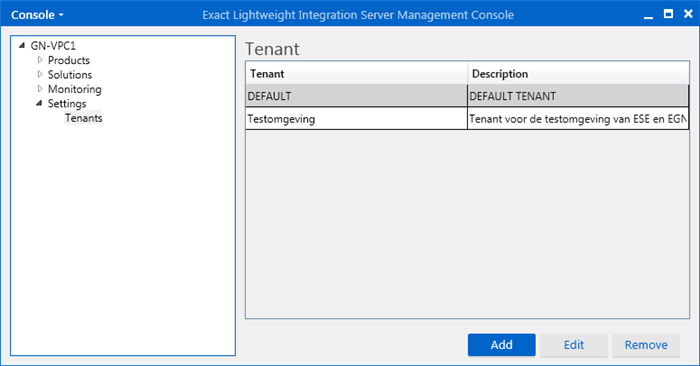
- Click Save. The tenant will be displayed in the ELIS
management console.
Editing tenants
- To edit a tenant, open the ELIS management console. The
following screen will be displayed:
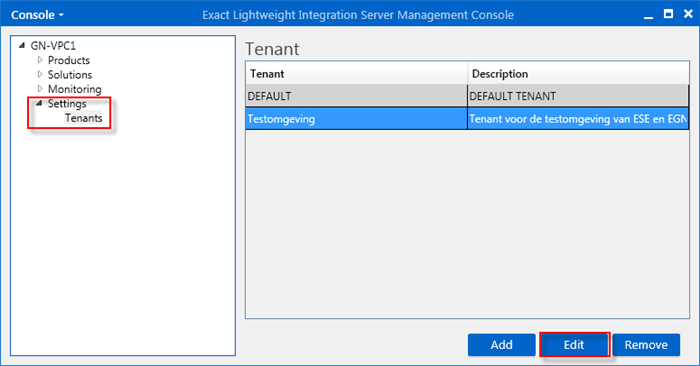
- Select Tenants under Settings on the left panel.
- Select a tenant that you want to edit on the right panel.
- Click Edit.
Removing tenants
- To remove a tenant, open the ELIS management console. The
following screen will be displayed:
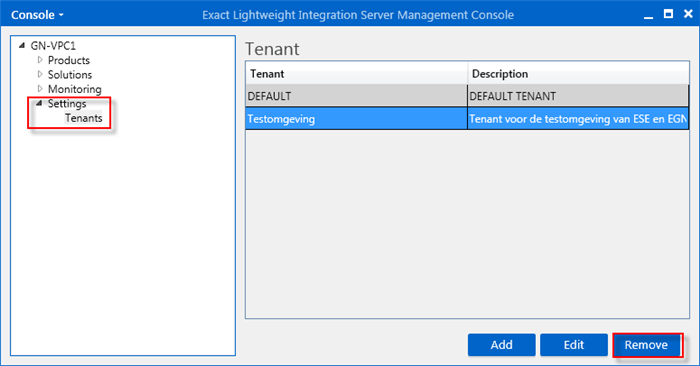
- Select Tenants under Settings on the left panel.
- Select a tenant that you want to remove on the right panel.
- Click Remove.
Note:
Tenants that have clients linked to them cannot be removed.
Related documents
| Main Category: |
Support Product Know How |
Document Type: |
Online help main |
| Category: |
On-line help files |
Security level: |
All - 0 |
| Sub category: |
Details |
Document ID: |
26.204.587 |
| Assortment: |
Exact Synergy Enterprise
|
Date: |
20-03-2015 |
| Release: |
254 |
Attachment: |
|
| Disclaimer |