Installation and configuration of Microsoft IIS for E-WMS on Windows Server 2012(R2)
Introduction
This document describes the steps to install and configure Microsoft IIS
for E-WMS ASP on a Windows 2012(R2) server, per product update
411.
Please refer to
this document for the IIS configuration in release 410 and earlier.
Description
This document contains following sections:
- Prerequisites
- Install Microsoft IIS
- Create and configure E-WMS website
- Application pool
- WMS website
- Troubleshooting
1. Prerequisites
2. Install Microsoft IIS
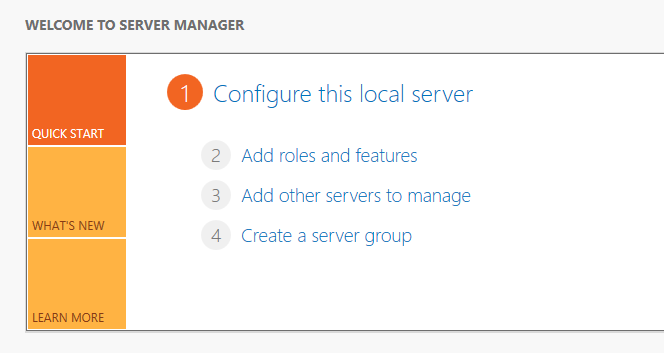
- In the Windows 2012 Server
Manager choose Add roles and features.
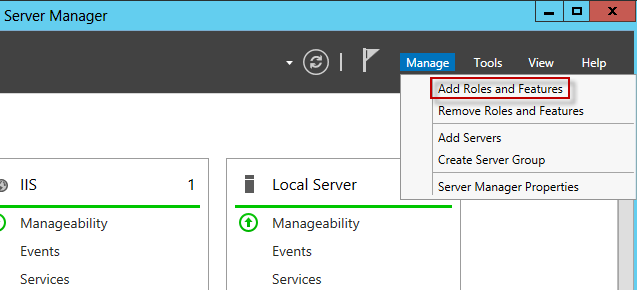
Or: select menu Manage, Add roles and features:
- You may
first encounter a 'Before you begin' screen, press Next
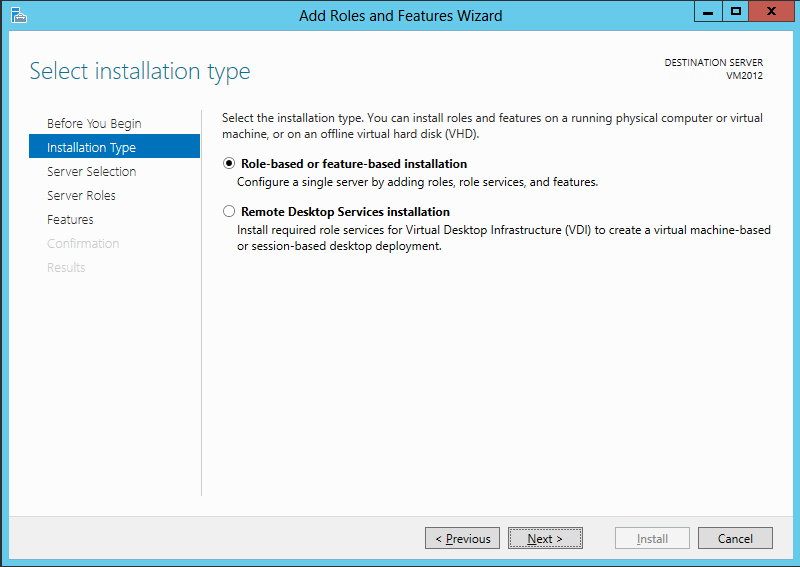
- In the screen 'Select
installation type', select 'Role-based or feature-based
installation' and press Next:
-
In the screen 'Select destination server', select the
server you want to install IIS on, and press Next:

- In the screen 'Select
server roles', scroll down in the list and select 'Web
Server (IIS)', and press
Next

When this next screen appears, make sure the option 'Include
management tools' is enabled and press 'Add
features':
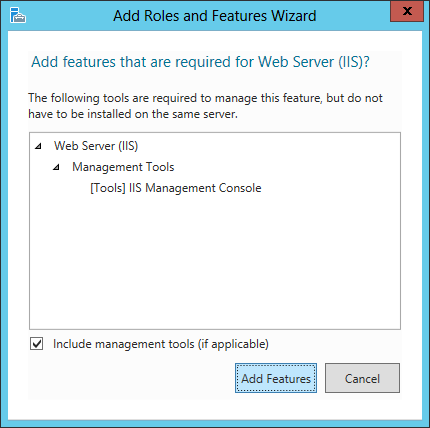
After this, you return to the screen 'Select server roles', where 'Web Server
(IIS)' is now enabled. Press Next.
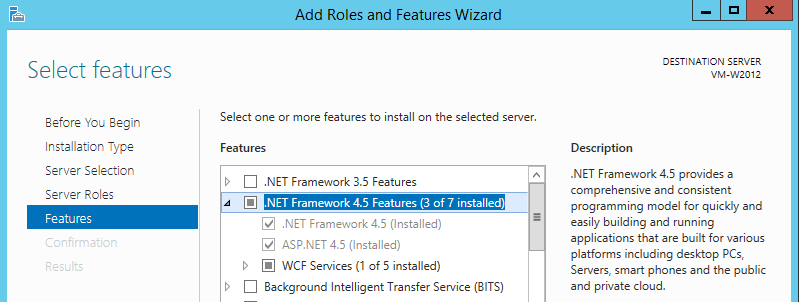
- In the next screen (titled 'Select
features'), expand '.NET Framework 4.5 Features'
and make sure '.NET Framework 4.5 ...'
is enabled, and press Next,
and Install.
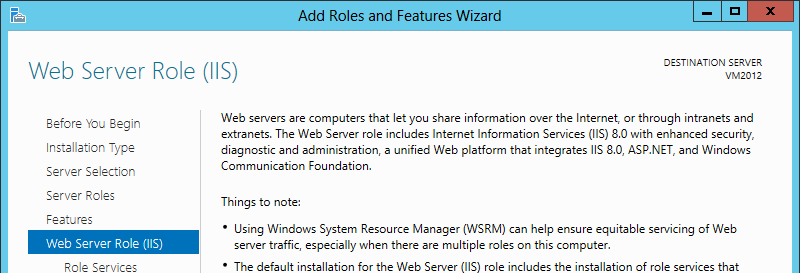
-
Next, an information screen titled 'Web Server (IIS)'
shows; press Next.
- In
the next screen the features for IIS can be selected:

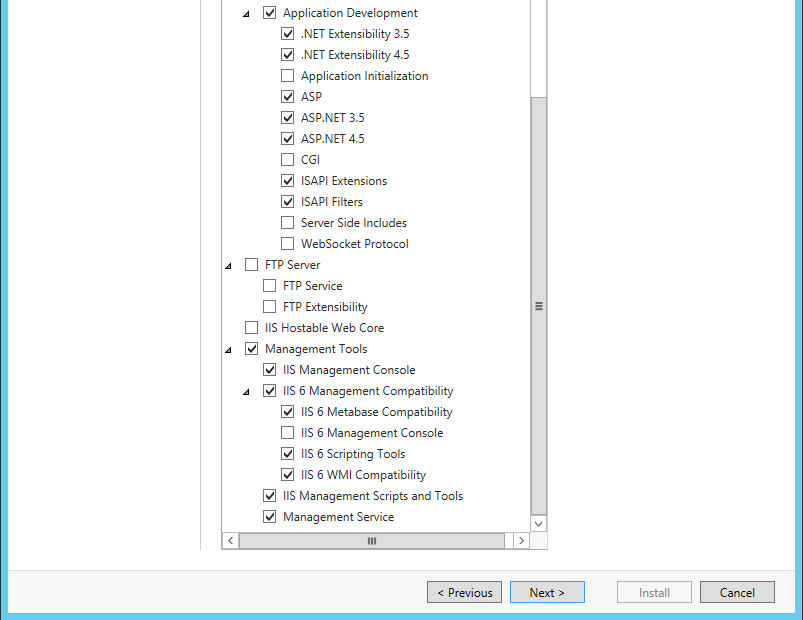
For E-WMS ASP, following is minimal required:
- Default document
- Static content
- Application development
- .NET Extensibility 4.5
- ASP
- ASP.NET 4.5
- Management tools: it is
not mandatory but
recommended to install all features
E-WMS does not use 'Windows authentication' but 'Anonymous authentication'.
Press Next when done.
-
In the next 'confirmation' screen, press
Install. You can leave the installation screen
open, or close it. The installation will continue in the background.
When the installation is done, the Server Manager Dashboard screen will show.
3. Create E-WMS website
Start the IIS manager to create or configure the E-WMS ASP website. You can
start IIS manager in a number of ways;
- Press (Windows Key)+R, type
INETMGR and press Enter
- In Server Manager (Dashboard): select Tools
menu, Internet Information Services (IIS) Manager
In the IIS manager, expand the IIS server name.
3.1 Application pool
In IIS, usage of non-default .NET usage or for instance usage
of a 32bit application, is managed through IIS
'Application pools'.
Since release 411, E-WMS uses .NET 4, is a 64bit application and uses
'integrated pipelines'.
These are the default settings for the IIS 'DefaultAppPool' which is default
linked to new web applications.
Therefore, creating
and linking a specific application pool for E-WMS is optional from
release 411.
Application pools are also used to isolate web applications. If you are using
multiple web applications on this IIS server, it is advised to create a separate
application pool for each web application.
To create an application pool for E-WMS, right-click on Application pools and select
Add application pool.
 wms
wms
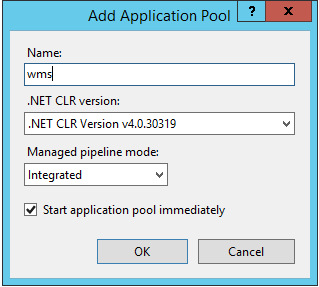
Following configuration is required for E-WMS:
- .NET Framework version = .NET Framework v.4.0xxxx
- Managed pipeline mode = Integrated
3.2 WMS website
To create a new website, expand the IIS
server name, expand Sites, right-click on
Default Web Site, then choose
Add application:

In the next screen, decide on the website name, for
example 'wms'. This will be the last part of the URL that will be used on the
WMS hand terminals (http://webserver/wms).
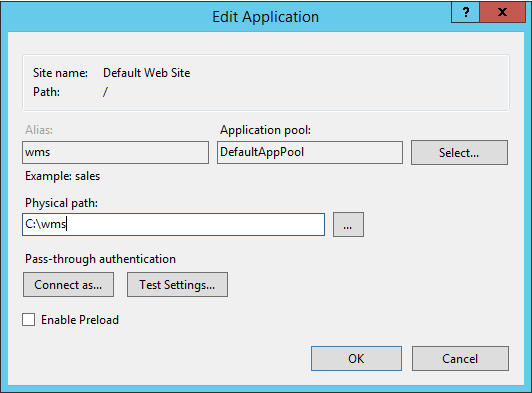
- Application pool: leave at the default, or select the application pool created for E-WMS
- Physical path: press the browse button and select the E-WMS ASP folder
created previously
Now you can test if the site would work. Select Browse *:80 http:

When one of these pages shows, then the website works OK and you can close Internet Explorer.
Next, you can configure
folder rights (only required when using Internet Explorer as WMS client) and setup the
database
connections for E-WMS ASP.
After that. the next test would be to access the website from WMSclient on a
PC or a scanner.
4. Troubleshooting
If you do not see the screen as in the previous chapter, but an
error message instead, you can check in
support documents if the error message is known.
Some general hints:
- make sure the application pool is properly
configured and linked to the WMS website
- make sure that only 'Anonymous authentication' is enabled, in the 'Authentication'
configuration option for the website
- make sure 'default.aspx' is listed in the web site configuration option
'Default document'
Related documents
| Main Category: |
Support Product Know How |
Document Type: |
Support - On-line help |
| Category: |
On-line help files |
Security level: |
All - 0 |
| Sub category: |
Details |
Document ID: |
26.765.740 |
| Assortment: |
E-WMS
|
Date: |
28-09-2017 |
| Release: |
|
Attachment: |
|
| Disclaimer |