Introduction
This document describes how you can use E-WMS in a remote warehouse, with the
offline 'CAB' E-WMS client.
Description
In a situation where you have a remote warehouse it is still possible to work
with E-WMS. The preferred solution would be to offer a wireless internet
connection within that remote warehouse; then you would be able to use WMS ASP.
This document offers more details for this scenario.
When it is not possible to offer wireless access, you can use the offline
E-WMS 'CAB' client. When using this client, stock transactions and picking
advices are saved on the hand terminal itself, until docking with a PC and
communication the changes back to Exact Globe Next. Using this scenario is not
recommended; this CAB client is in maintenance mode since 2009 and does not
offer any of new functionality added to E-WMS ASP since then.
For this 'batch' (Activesync) or 'File' communication, the hand terminal has
to connect to a Exact Globe Next (EGN) PC using an USB connection. However, EGN
will not be installed on a PC in a remote warehouse, but EGN will only be
accessible over a terminal server session. In that case, standard it is not
possible to pass the local USB connection to that remote connection and read the
data from the local hand terminal to the remote EGN session. There are software
solutions available that make this possible, but these are not tested by Exact.
On the local PC in the warehouse you will need a tool which can communicate
with the USB hand terminal, save the transactions and make these available to an
E-WMS Control Center.
File communication
In the E-WMS settings in Exact Globe Next, change the communication method
to 'File' (or enable 'Ask user'), for all WMS processes you are using. In the
E-WMS General settings, configure the 'Communication' and 'Archive' directory to
either a shared network folder (accessible directly to the warehouse PC), or to
a local folder.
When not using a shared network folder, you will have to copy the WMS data
files manually each time, from the warehouse PC to a network location or to a
local folder on a EGN PC at the 'head quarters'.
E-WMS communication tool
After installing Exact Globe Next on your PC (in the head quarters), the
folder C:\Program Files\Exact Software\INSTALL\E-WMS\TOOLS contains the file E-WMSCommToolSetup.msi.
This file has to be made available to the local PC in the warehouse and has to
be installed there. The tool also requires installation of Microsoft .NET
Framework 2 or 3.5. After installation, you will find a file called 'exeaPickITTool.exe.config'
in the program installation folder (default: C:\Program Files\Exact
Software\Exact WMS communication Tool). This file determines what folders are
used when transferring files from and to a hand terminal.
ExeaPickITTool.exe.config
This file has following default content:
| |
<?xml
version="1.0" encoding="utf-8"?>
<configuration>
<appSettings>
<!-- User
application and configured property settings go here.-->
<!-- Example: <add key="settingName"
value="settingValue"/>
-->
<add key="ConversionOnly"
value="False" />
<!-- Platforms supported : Desktop, HT -->
<add key="Platform" value="HT" />
<add key="LocalPath"
value="C:\E-WMS" />
<add key="RemotePath"
value="program files\E-WMS" />
<add key="language" value="en"/>
<!-- en=English, nl=Dutch
-->
</appSettings>
</configuration> |
| |
|
ConversionOnly
False (default): a target file is converted from DAT to XML (or vice versa) and
also sent to the hand terminal.
True: a target file is converted from DAT to XML (or vice versa) but not
communicated, instead stored in the same folder.
Platform
Please leave configured as HT
LocalPath
The path to the communication folder as configured in the WMS General settings.
This could be a local folder or a network share.
RemotePath
This is the folder where E-WMS is default
installed on the hand terminal, and where XML files are read from or copied to.
Language
This is the language in which the E-WMS Communication Tool will be used.
Supported languages are EN (English) and NL (Dutch).
File types
When using Activesync of File communication, WMS uses two types of files. On the
hand terminal, transactions and advice lines are stored as XML files. The
Control Center only imports and export files in DAT format. The communication
tool performs the conversion between DAT and XML format.
When working with Activesync or File communication, you cannot add
additional transactions to existing transactions in a file, or on a hand
terminal. So when sending new transactions to be picked, first make sure that
any previous sent transactions are already communicated to the scanner. When
sending transactions to the scanner in the Communication tool, make sure that
you first read back in the communication tool, and into the Control Center. When
reading back free scanner transactions like transfers or counts, make sure that
you read back any previous transactions first into the Control Center, before
reading back additional scanner transactions.
Folders
If the folder configured in Exact Globe Next as 'Communication folder', and the
folder configured as 'LocalPath' in the config file, are in practice not the
same physical folder, then you will have to exchange files between those two
folders manually. Therefore using the same network share in both settings is an
option, but that could also lead easier to overwriting existing files which are
not processed yet. When exchanging files manually there will be more control and
supervision to limit that risk.
Sending transactions to a hand terminal
In Exact Globe Next (head quarters or remote session), start the appropriate
Control Center, select the orders or items to be picked, and send these picking.
The control center creates DAT files in the WMS communication folder and will
overwrite any existing files there.
Next, these transactions have to be send to the hand terminal by starting the
WMS Communication Tool:
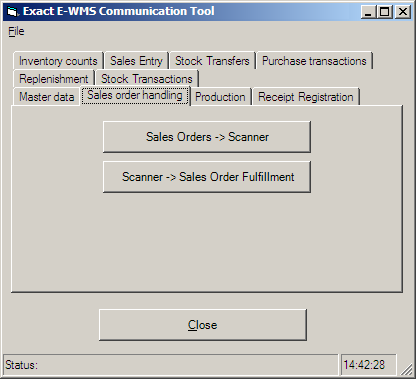
Connect the hand terminal. Choose the appropriate tab, for example 'Sales order
handling' and select the first button ('To' scanner). This will overwrite any
existing transactions of the same type on the scanner. Be sure to read back
transaction first.
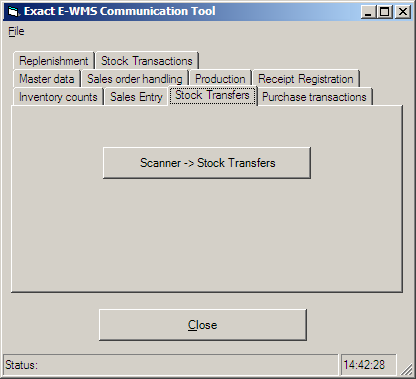
Reading transactions from a hand terminal
Make sure that any previous read back transactions are already read into the
Control Center. Start the Communication Tool and select the appropriate tab, for
example 'Stock Transfers' and press the button ('from' scanner).
The communication tool will create a DAT file in the communication folder ('LocalPath'
in the Config file). Next, start the WMS Control Center to read back this
transaction.