Introduction
This document describes the installation of WMSclient on hand terminal and on
PC.
Description
WMSclient is a 'thin client', which means it has no business logic but only
'draws the screen' and facilitates input of the user.
Updating WMSclient is not required with every product update, but only when specifically stated in release notes.
From release
411, you can start WMSclient on a PC, from within Exact Globe Next menu
WMS, Entry, Scanner, and a separate installation of WMSclient is no longer
required.
When you already had the WMSclient installed on your hand terminal or PC,
and you have to
update to a higher version of WMSclient, then follow these
steps first:
- hand terminal: just follow the steps below in 'install
on hand terminal', where installation options 'Framework setup' or
'Messages setup' will not apply. Follow the steps in 'Install
on hand terminal' and next only 'WMS Client setup'.
Uninstalling a previous version is usually not required, but that may depend
on make and model of the hand terminal.
- PC: go to Windows Control Panel, "Programs and features" (or:
"Add/remove programs") and uninstall "WMS client". Then
install the new WMSclient version.
Installation on hand terminal
Cold boot folder
If your hardware supplier provided a cold boot folder including automatic
installation of WMSclient, then the file WMSclient.cab needs to be replaced with
the new version, in that cold boot folder.
The updated client installation file is located in the WMS ASP IIS folder, on
the IIS server, after updating the Exact Globe Next workstation installation,
and
updating WMS ASP. When the WMS IIS folder is C:\E-WMS\IIS, then
WMSclient.cab is located in folder
C:\E-WMS\IIS\WMSClient. You can use an USB connection to the device to copy
the file, or you can download and save the CAB file using the method in next
chapter 'Manual installation', and just saving the CAB to the cold boot folder.
After copying the new CAB to the cold boot folder on the terminal, you can
perform a cold boot, or you can still install WMSclient manually (see next
chapter).
Manual installation
The WMS client has to be installed by starting a 'CAB' installation file. This CAB file is
stored in the 'WMSClient' subfolder of WMS ASP on the IIS server and can be
accessed by browsing to http://webserver/wms/wmsclient(replace 'webserver' with the name or IP address of your web server,
and 'wms' with the site name of your WMS website, make sure you add '/wmsclient').
You will then see a landing page, with installation choices for Windows CE,
Windows Mobile, Pocket PC and Windows PC:
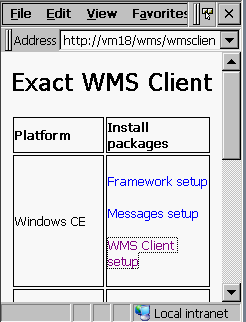
Please determine if you are using
Windows CE or Windows Mobile and choose the install option in the
appropriate section, 'Windows CE', 'Windows mobile', 'Windows PC' ('Pocket PC'
will generally not be used anymore).
Go directly to:
Framework setup
The WMS Client requires Compact Framework .NET 3.5 to be installed on the
device. If you were already using ERF client or WMSclient on the device, then .NET was already
installed and you can choose 'WMS Client setup' directly. Otherwise, choose
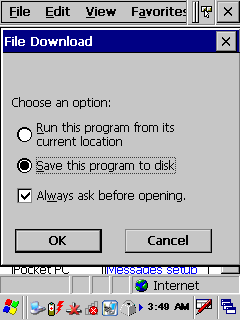
'Framework setup'. Depending on your device and available storage, you can
choose 'Run ..' or 'Save ..' on selecting the file. In some cases 'Run ..'
may not succeed, then you have to choose 'Save ..'.
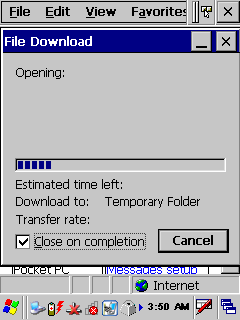
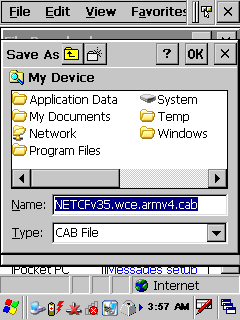
When choosing 'Save', make sure to select a target folder where you can find the
CAB file back again, for example directly in 'My Device' (root folder). This
requires about 20Mb available storage space (10Mb to save the CAB file and 10Mb
for installation of the CAB file).
| Choose Run or Save |
'Run' : |
'Save': |
|
|
 |
 |
 |
|
|
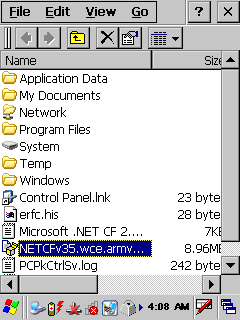
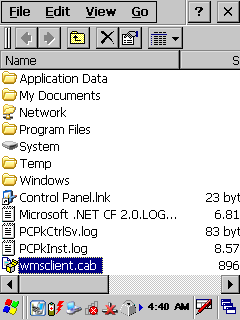
After saving, start File Explorer on the device and browse to the folder
where the CAB was saved. Double tap on the file 'NETCFv35.....'.
If Windows
responds that a later version is already installed, then you don't have to
install this CAB and you can delete it here.
|
Exploring 'My device'
|
 |
Messages setup
'Messages' is an additional installation file for .NET Compact Framework and is
required for E-WMS. If you already installed ERF or WMSclient before, you have this
component installed already. Otherwise, follow the same steps as described as for
'Framework setup'.
Client setup
The link 'WMS Client setup' starts the installation of the new client.
| Landing page |
Run or Save |
Target folder |
Saving |
|
|
|
 |
 |
 |
|
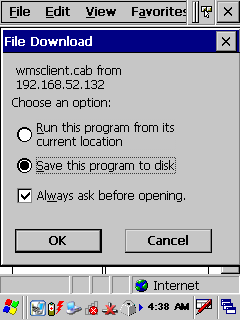
Choose 'WMS client setup' for the
correct operating system. |
You can first try to choose 'Run ..',
to start immediate installation.
You will have to choose 'Save ..'
when 'Run' does not succeed. |
'Save ..' will open this dialogue, store for example directly in 'My
Device' (root folder), or in the cold boot folder of the device. |
|
|
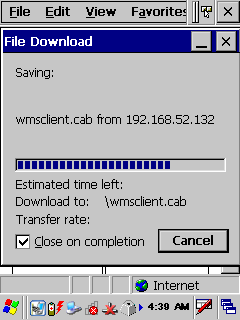
When you have chosen 'Save this program to disk' and after downloading has completed, start File Explorer on the device and browse to
the root folder ('My device'). Double tap on the file 'wmsclient.cab'. The WMS
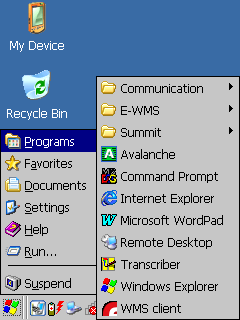
client is installed in folder \Program Files\WMSclient, and a new menu entry
'WMS client' is created in Start, Programs.
| Exploring 'My device' |
Start menu |
|
|
|
 |
 |
|
|
|
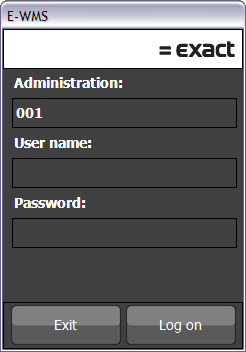
Starting the client
When starting the WMS client for the first time, you will see an empty connection screen.
Type the URL of your WMS web server, for example 'http://webserver/wms'
or 'http://192.168.1.3/wms' and press 'Connect'.
This URL will be saved for the
next logon (in file \erfc.his on the device)
Install on PC
There are two ways to install WMSclient on a PC, depending if WMS ASP web
parts are installed on your PC.
When the E-WMS website in installed on your PC: start WMSClient.msi in the
WMSclient subfolder of the WMS ASP IIS folder.
When the E-WMS website is not installed on your PC: start Internet Explorer and browse to
http://webserver/wms/wmsclient. Replace 'webserver' with the name or IP address of your web server,
and 'wms' with the site name of your WMS website, and make sure you add '/wmsclient'.
You will then see a landing page, with installation choices for Windows CE,
Windows Mobile, Pocket PC and Windows PC. Choose the link 'WMS client setup' in section 'Windows PC' and install the
application.
After installing, the client can be started through Start/Exact WMS client.
You may have to grant specific 'modify' rights to
yourself or 'Users', on the
folder where WMSclient is installed (default x64 folder: C:\Program Files
(x86)\Exact\WMS Client), to be able to save the used URL in the file erfc.his in
that folder. Otherwise you will see an error when closing WMSclient.